
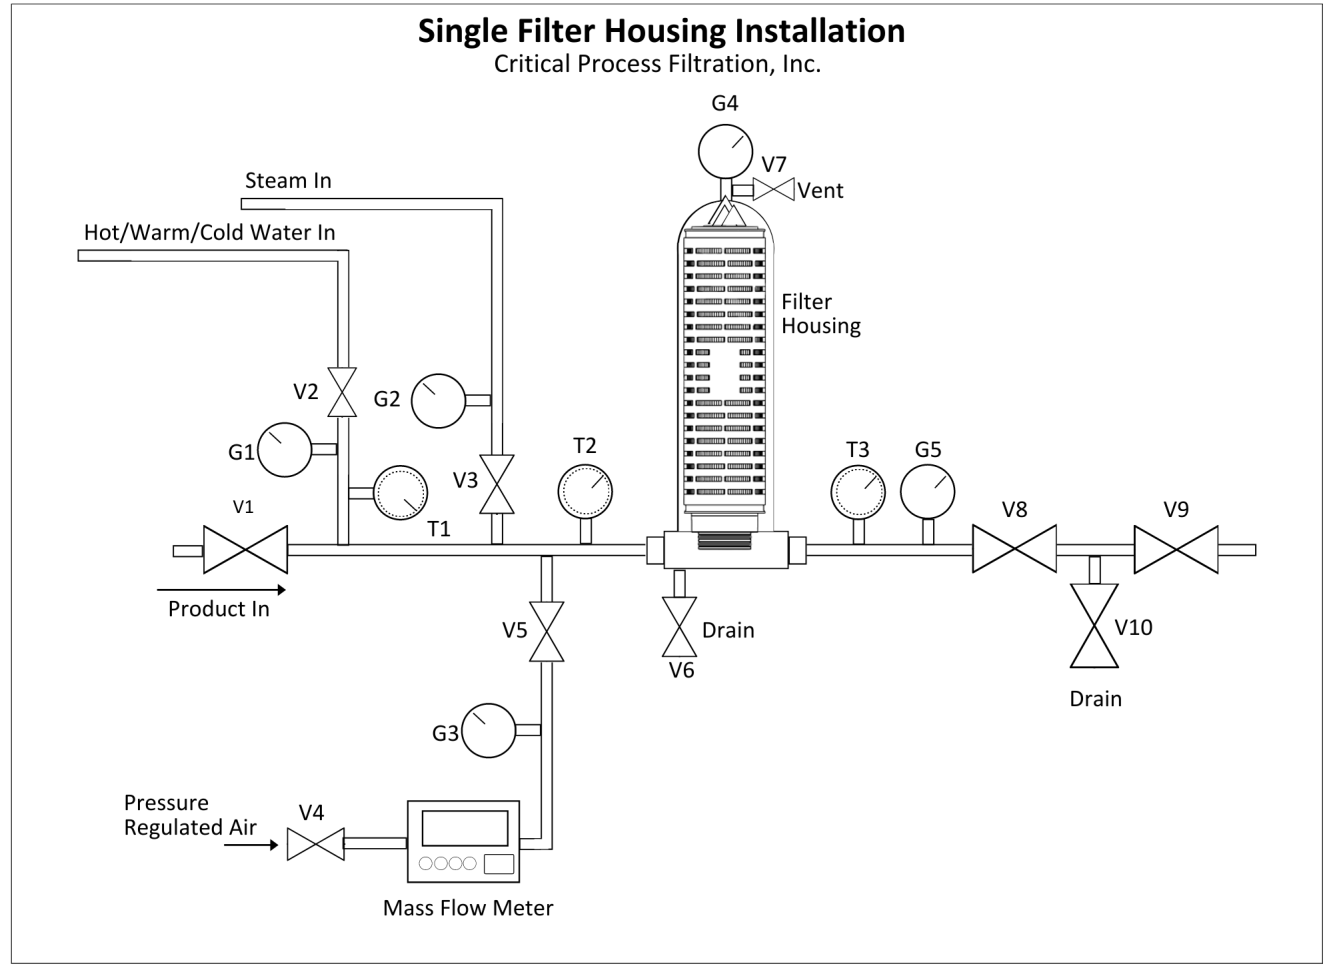
To facilitate filter installation and the sanitization and sterilization of filters during use, please refer to the schematic below.
NOTE: While the schematic and filter installation instructions outlined below are specific to single filter housings, the same connections, valves and gauges also apply to multi-filter housings. Filter installation steps will be the same for each position in the housing. Multi-filter housings typically have an opening at the top rather than the housing bowl described below.
Contact CPF Customer Service for additional details on multi-filter housing installation.
Housing Installation
Critical Process Filtration Cartridge Filters should, at minimum, be installed in a housing system as shown in the schematic with the valves and pressure gauges in place for the “Product In” line. If the cartridge is being installed in a system that will be heat sanitized or steam sterilized, then the lines, valves, pressure gauges and temperature gauges for “Hot Water In” and/ or “Steam In” should also be in place. If the filter is to be integrity tested, then the mass flow meter portion of the system shown should also be installed.
Filter Cartridge Installation
- Shut off flow by first closing valve V1, and making sure that valves V2, V3, V4 and V5 are also closed. Then close all other valves open during operation. (Caution: Do not open the housing until pressure gauges G4 and G5 both show “0” pressure.)
- Open Vent (Valve 7) and Drain (Valve 6) to empty housing of liquid. Open downstream drain valve V10, if desired.
- Remove the housing bowl and remove the old filter.
- UNPACKING THE NEW FILTER - KEEP THE FILTER IN THE BAG UNTIL STEP 6. Cut an opening in the bag containing the new filter at the end with the O-rings. Keep the filter in the bag and wet the O-rings with water or the fluid being filtered. DO NOT TOUCH THE FILTER WITH BARE HANDS OR FINGERS.
- With the new filter still in the bag, push the O-ring end into the filter housing head using a twisting motion to ensure a complete seal. If the filter has a 2-226 or 2-223-Tab O-ring configuration, make sure that the locking tabs engage with the tab holders in the housing head.
- Remove the bag and replace the filter housing bowl.
- Close the Vent (V7) and Drain (V6 and/or V10).